Every week, our quality team reviews first article samples from blow molding suppliers Cpk values 1. Too often, we see buyers accept parts without clear criteria. Then problems surface during mass production. Costs rise. Deadlines slip. Relationships strain.
Setting first article acceptance criteria for plastic blow molding parts 2 requires defining measurable standards for dimensional tolerances, wall thickness uniformity, surface quality, functional performance, and process documentation. These criteria verify supplier capability before committing to full production, preventing costly defects and ensuring parts meet design specifications.
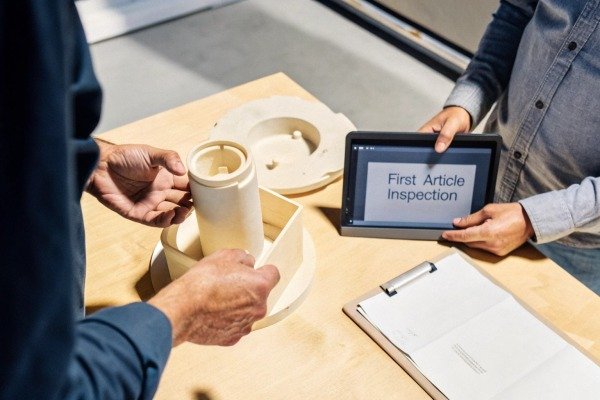
This guide walks you through each critical element. You will learn what to inspect, what tests to require, and what documentation to demand. Let us dive in.
What common defects should I check for during the first article inspection of blow molded parts?
Our engineers have seen countless blow molding defects 3 over the years. Some are obvious. Others hide until the part fails in service. Knowing what to look for saves time and money.
Common blow molding defects include uneven wall thickness, parting line mismatch, flash, drag lines, sink marks, black specks, rocker bottoms, and poor surface finish. Inspect both visual and structural aspects using limit sample boards and measurement tools to establish clear accept/reject boundaries.

Visual Defects to Catch Early
Visual inspection comes first. It is fast and reveals many problems. Look for these issues:
Flash appears as excess material along parting lines. It indicates tooling wear or improper clamping pressure. Flash requires trimming. This adds cost and can affect fit.
Drag lines are vertical streaks on the part surface. They come from parison contact with the mold during inflation. Minor drag lines may be acceptable for non-visible surfaces. But customer-facing parts need clean surfaces.
Black specks signal contamination or degraded material. They are unacceptable in transparent or light-colored parts. Ask about material handling and purging procedures.
Rocker bottoms occur when the base of a container is not flat. The part rocks when placed on a surface. This affects stability and stacking.
Structural Defects That Compromise Performance
Beyond appearance, structural integrity matters most. These defects hide inside the part:
Wall thickness variation is the most critical blow molding defect. Thin spots weaken the part. Thick spots waste material and add weight. Use ultrasonic thickness gauges 4 to check multiple points.
Parting line mismatch means the two mold halves did not align properly. This creates steps or gaps that weaken seams. Measure mismatch with calipers or optical comparators.
Sink marks are depressions on the surface. They occur when thick sections cool unevenly. They indicate poor parison programming or cooling issues.
Defect Classification Table
| Defect Type | Detection Method | Typical Cause | Severity Level |
|---|---|---|---|
| Flash | Visual inspection | Worn tooling, low clamp force | Minor to Major |
| Wall thickness variation | Ultrasonic gauge | Poor parison control | Critical |
| Parting line mismatch | Caliper measurement | Mold misalignment | Major |
| Drag lines | Visual inspection | Parison contact issues | Minor |
| Black specks | Visual inspection | Material contamination | Major |
| Rocker bottom | Flatness gauge | Uneven cooling | Major |
| Sink marks | Visual/tactile | Thick sections, cooling | Minor to Major |
Creating Limit Sample Boards
Words alone cannot define acceptable quality. Create limit sample boards instead. These boards show actual parts at the edge of acceptability.
Include three categories:
- Acceptable samples that meet all criteria
- Borderline samples that barely pass
- Reject samples that fail inspection
Share these boards with your supplier. Mount them in the inspection area. They eliminate arguments about subjective defects.
Our team keeps limit samples for every blow molding project. When questions arise, we compare to the physical standard. This speeds decisions and ensures consistency.
How do I determine realistic dimensional tolerances for my plastic blow molding design?
When we develop blow molding projects with US clients, tolerance discussions start early. Setting tolerances too tight wastes money. Setting them too loose causes assembly failures. dimensional tolerances 5 Finding the right balance requires understanding the process.
Realistic dimensional tolerances for blow molding are typically wider than injection molding, ranging from ±0.5mm to ±2.0mm depending on part size and feature type. Wall thickness uniformity of ±10-15% is standard. Critical dimensions like neck finishes and mating surfaces require tighter control through tooling precision and process monitoring.

Why Blow Molding Tolerances Differ
Blow molding stretches heated plastic into shape. This stretching introduces variability. Unlike injection molding 6 where material fills a closed cavity, blow molding inflates a parison (tube) against mold walls.
The blow-up ratio determines how much the parison stretches. Standard ratios range from 2:1 to 4:1. Complex shapes may reach 7:1. Higher ratios mean more variability.
Material behavior during stretching varies too. Temperature differences, parison thickness variations, and blow timing all affect final dimensions.
Tolerance Guidelines by Feature Type
Different features need different tolerances. Here is what we recommend:
| Feature Type | Typical Tolerance | Notes |
|---|---|---|
| Overall length/width | ±1.0mm to ±2.0mm | Depends on part size |
| Wall thickness | ±10-15% of nominal | Critical for structural parts |
| Neck finish diameter | ±0.1mm to ±0.25mm | Must match caps/closures |
| Handle openings | ±0.5mm to ±1.0mm | Affects grip comfort |
| Parting line location | ±0.5mm | Cosmetic consideration |
| Flatness | 1-2% of span | For stacking surfaces |
Critical Dimensions Deserve Extra Attention
Not all dimensions matter equally. Identify your critical dimensions early. These typically include:
- Neck finish dimensions for cap compatibility
- Overall height for filling equipment
- Thread specifications for closure torque
- Mounting hole locations for assembly
- Mating surface profiles for sealing
For critical dimensions, specify tighter tolerances. Budget for better tooling. Require capability studies during first article approval.
The Cost of Tight Tolerances
Tighter tolerances cost more. Here is why:
- Better tooling materials and precision
- More frequent process adjustments
- Higher rejection rates
- Additional inspection steps
- Slower production speeds
Ask yourself: Does this dimension truly need tight control? If the part functions within wider limits, accept them. Save tight tolerances for features that demand them.
Working with Your Supplier
Share your tolerance requirements before tooling starts. Ask suppliers to flag dimensions they consider challenging. Experienced blow molders know their process capabilities.
Our approach: We review drawings with suppliers before quoting. We discuss each tolerance. We adjust where possible. We highlight where we cannot compromise. This prevents surprises during first article inspection.
Which functional tests should I require to validate the structural integrity of the first sample?
During our supplier qualification process, we require specific functional tests. Visual inspection and dimensional checks are not enough. Parts must perform under real-world conditions.
Essential functional tests for blow molded parts include pressure/leak testing to verify seal integrity, top load testing for stacking strength, drop testing for impact resistance, and fitment testing for mating components. Test conditions should simulate or exceed actual service requirements to provide adequate safety margins.

Pressure and Leak Testing
For containers and vessels, leak testing is mandatory. Two methods are common:
Positive pressure testing inflates the part with air or nitrogen. Submerge in water and look for bubbles. Or use pressure decay measurement. The part holds pressure for a set time. Any drop indicates leakage.
Vacuum testing applies negative pressure. It pulls the part inward. Listen for hissing. Measure vacuum decay.
Test at pressures exceeding normal service conditions. A 2x safety factor is standard. If your container holds 1 bar during use, test at 2 bar minimum.
Top Load and Compression Testing
Stacked products need strength. Top load testing applies compressive force to the filled part. It measures deformation and failure point.
Test conditions matter. Temperature affects plastic strength. Test at the highest storage temperature expected. A part that survives at 20°C may fail at 40°C.
Record both maximum load and deformation at specified loads. Compare to your stacking requirements. Add safety margin for shipping vibration and handling impacts.
Drop Testing
Drop tests simulate handling abuse. They reveal weak points in the design.
Standard test protocols include:
- Flat drop onto base
- Corner drops
- Edge drops
- Angled drops
Drop from heights representative of handling conditions. 1 meter is typical for manual handling. Higher drops simulate conveyor transfers or pallet drops.
Test filled parts at service temperature. Cold plastic is more brittle. If your product ships in winter, test cold.
Fitment and Assembly Testing
Blow molded parts rarely stand alone. They connect to caps, pumps, valves, and other components. Fitment testing verifies these interfaces work.
Test with actual production components, not prototypes. Variations in both the blow molded part and mating components affect fit.
Check:
- Thread engagement and torque
- Snap-fit retention force
- Seal compression
- Clearances for moving parts
Functional Test Requirements Table
| Test Type | Purpose | Key Parameters | Pass Criteria |
|---|---|---|---|
| Pressure/leak | Seal integrity | Test pressure, hold time | Zero leakage at 2x service pressure |
| Top load | Stacking strength | Applied force, temperature | <5% deformation at rated load |
| Drop test | Impact resistance | Height, orientation, temperature | No cracks, leaks, or functional loss |
| Fitment | Component compatibility | Torque, retention force | Within mating spec ±10% |
| Environmental | Service conditions | Temperature, humidity, UV | Meets spec after exposure cycle |
Destructive vs Non-Destructive Testing
Some tests destroy the sample. Others preserve it. Both have value.
Destructive tests (tensile, impact, burst) give definitive data. They reveal actual failure modes. But they consume samples.
Non-destructive tests (ultrasonic, X-ray, pressure decay) preserve parts. They allow 100% inspection in production. But they may miss subtle flaws.
For first article approval, use both. Destructive tests verify design capability. Non-destructive methods validate inspection procedures for production.
What documentation should I request from the manufacturer to verify the first article inspection results?
Our clients in the US expect thorough documentation. Words mean nothing without data. Proper documentation proves compliance and enables traceability.
Request comprehensive First Article Inspection reports including dimensional measurement data, material certifications, process parameter logs, functional test results, and visual inspection records. PPAP documentation packages provide standardized formats covering these requirements plus control plans and capability studies for ongoing production.

Essential Documentation Elements
Every first article package should include these items:
Dimensional inspection report lists every drawing dimension. It shows nominal value, tolerance, actual measurement, and pass/fail status. Multiple samples should be measured. Calculate averages and ranges.
Material certification confirms resin type, grade, and lot number. It includes material data sheet properties. It traces material back to the producer.
Process parameter log records settings during sample production. Temperatures, pressures, cycle times, and blow parameters. This enables reproducibility.
Functional test results document each test performed. Include test method, conditions, acceptance criteria, and actual results.
PPAP: The Gold Standard
Production Part Approval Process 7 (PPAP) provides a comprehensive framework. Originally from automotive, it applies to any precision manufacturing.
PPAP levels vary by customer requirements. Level 3 is most common. It includes:
- Design records (drawings, specs)
- Engineering change documents
- Customer engineering approval
- Design FMEA
- Process flow diagram
- Process FMEA
- Control plan 8
- Measurement system analysis
- Dimensional results
- Material test results
- Initial process studies
- Qualified laboratory documentation
- Appearance approval report
- Sample production parts
- Master sample
- Checking aids
- Customer-specific requirements
- Part submission warrant
Not every blow molding project needs full PPAP. But the structure ensures nothing is missed.
Documentation Checklist Table
| Document Type | Content | Purpose | When Required |
|---|---|---|---|
| Dimensional report | All dimensions measured | Verify drawing compliance | Always |
| Material cert | Resin grade, lot, properties | Confirm material spec | Always |
| Process parameters | Settings during production | Enable reproducibility | Critical parts |
| Test results | Functional test data | Verify performance | Per application |
| Control plan | Inspection points, frequency | Ensure consistency | Production approval |
| Capability study | Cpk/Ppk calculations | Predict process stability | Critical dimensions |
| Appearance approval | Visual standard agreement | Align expectations | Customer-facing parts |
Process Capability Studies
For critical dimensions, capability studies provide confidence. They measure process variation against tolerance limits.
Cpk values indicate how well the process centers within tolerance. Cpk ≥ 1.33 is typically acceptable. Cpk ≥ 1.67 indicates excellent capability.
Request capability data for your critical dimensions. A capable process produces consistent parts. An incapable process surprises you with defects.
Ongoing Documentation Requirements
First article approval is just the start. Require ongoing documentation:
- Inspection records for each production lot
- Non-conformance reports and corrective actions
- Process change notifications
- Annual revalidation data
Build documentation requirements into your purchase agreement. Make them a condition of continued business.
Red Flags in Supplier Documentation
Watch for these warning signs:
- Missing or incomplete data fields
- Round numbers suggesting estimated values
- Test dates not matching production dates
- Material certs from unknown sources
- Capability studies showing unstable processes
When you see red flags, investigate. Ask questions. Visit the supplier if needed. Problems in documentation often signal problems in production.
Conclusion
Setting clear first article acceptance criteria protects your projects. Define defect standards, realistic tolerances, functional tests, and documentation requirements before production starts. These steps ensure your blow molded parts meet specifications the first time.
Footnotes
1. Defines Cpk as a statistical metric measuring a manufacturing process’s ability to meet quality requirements. ↩︎
2. Explains the industrial manufacturing process for creating hollow plastic parts. ↩︎
3. Lists and describes common flaws that can occur during the blow molding manufacturing process. ↩︎
4. Explains the principle and operation of ultrasonic thickness gauges for non-destructive measurement. ↩︎
5. Defines engineering tolerances and their importance in manufacturing for part functionality and quality. ↩︎
6. Provides a complete guide to injection molding, a formative manufacturing technology. ↩︎
7. Defines the industry standard for production part approval, ensuring supplier manufacturing processes meet requirements. ↩︎
8. Explains how control plans focus on critical product characteristics to ensure quality and reduce defects. ↩︎