We see too many shipments delayed because initial samples weren’t vetted properly on our factory floor UT uses sound waves 1. Ignoring minor flaws now creates massive headaches during mass production.
To validate welding samples effectively, you must perform a rigorous visual inspection for surface defects like cracks and undercut, then verify dimensions against your drawings. You should also demand NDT reports for internal integrity and confirm compliance with codes like AWS D1.1 or ISO 5817.
Let’s examine the specific inspection steps and standards that ensure your custom parts hold up in the field.
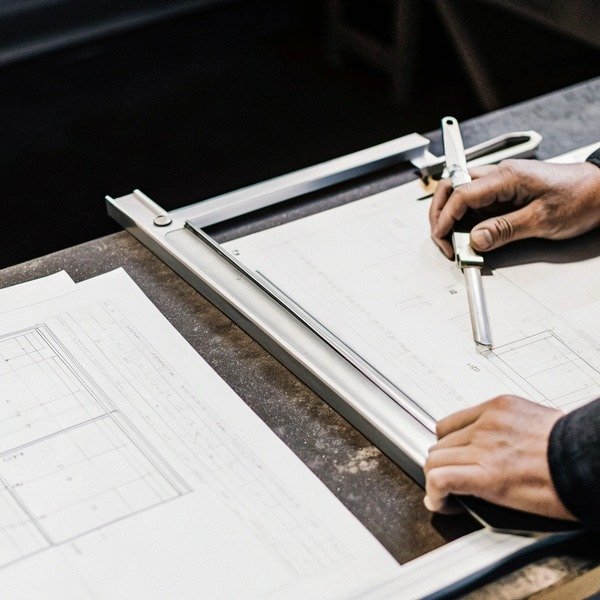
How do I visually inspect the weld bead profile and dimensions against my engineering drawings?
In our Vietnam shop, we perform rigorous spot checks that save thousands of dollars in potential rework later. Visual flaws are often the first sign of deeper process issues.
Inspect the weld bead profile using fillet gauges to ensure leg length meets print specifications. Simultaneously, check for prohibited visual defects such as surface cracks, crater pipes, or undercut exceeding 1/32 inch, as these compromise structural load-bearing capacity and fatigue resistance.

The First Line of Defense: Visual Checks
Visual inspection (VT) is the most cost-effective way to evaluate a welding sample. Visual inspection (VT) 2 You do not need expensive equipment to catch 80% of welding defects. When we receive a sample frame, our first step is to look for "showstoppers." These are defects that automatically disqualify a part.
You must look for cracks first. A crack is never acceptable. It does not matter how small it is. If you see a crack on the face, in the crater, or at the weld toe, the process is out of control. Next, look for undercut. This is a groove melted into the base metal near the weld toe. It creates a weak point where stress gathers. Most structural standards allow very little undercut. structural standards 3
Verifying Dimensional Accuracy
After checking for defects, you must measure the weld. Use a fillet weld gauge for this. You need to verify the leg size and the throat thickness. If the drawing calls for a 1/4" fillet, a 3/16" weld is a failure. It will not hold the designed load.
Also, check the profile shape. The bead should be flat or slightly convex. Excessive convexity wastes material and creates stress risers. Excessive concavity might mean the throat is too thin. We often find that suppliers try to save wire by undersizing welds. undersizing welds 4 You must catch this during the sample phase.
Common Visual Defects and Tolerances
Different industries tolerate different defect levels. However, for a structural aluminum frame, you should generally follow strict limits. Below is a comparison of common defect limits we use for reference.
| Defect Type | AWS D1.1/D1.2 (Structural) | ISO 5817 Quality Level B (High) | Почему это важно |
|---|---|---|---|
| Cracks | Prohibited | Prohibited | Causes catastrophic failure. |
| Undercut | Max 1/32" (0.8mm) | Max 0.5mm | Reduces fatigue life significantly. |
| Porosity | Max 1 visible pore per 4" | Prohibited / Very Strict | Indicates gas shielding issues. |
| Overlap | Prohibited | Prohibited | Indicates poor fusion at the toe. |
| Spatter | Must be removed | Must be removed | Affects painting and aesthetics. |
Inspecting the Finish
Finally, look at the aesthetics. For the silver-colored aluminum frames we handle, appearance matters. The ripples should be uniform. Spatter should be removed. If the weld looks messy, the welder likely had poor control. A "Class A" finish requires a smooth, consistent appearance suitable for visible parts. Do not accept rough workmanship on a sample, or the production run will be worse.
What non-destructive testing reports should I demand to verify the structural integrity of the welding samples?
Our engineers insist on seeing beneath the surface before we approve any safety-critical component. Visual checks cannot reveal the internal flaws that cause field failures.
Request Liquid Penetrant (PT) or Magnetic Particle (MT) reports to detect fine surface cracks invisible to the naked eye. For critical stress points, demand Ultrasonic (UT) or Radiographic (RT) testing to identify internal volumetric flaws like slag inclusions or lack of fusion.

Surface NDT Methods
Visual inspection has limits. It cannot see tight cracks or hairline fractures. This is where surface NDT helps. For aluminum frames, Liquid Penetrant Testing (PT) is essential. Liquid Penetrant Testing (PT) 5 Aluminum is non-magnetic, so you cannot use Magnetic Particle Testing (MT).
In PT, a colored dye is applied to the weld. It seeps into cracks. After cleaning, a developer draws the dye out. This reveals bright red lines where cracks exist. We require PT reports for all critical joints on aluminum samples. It proves the welder stopped the arc correctly without leaving crater cracks.
If your part is steel, Magnetic Particle Testing (MT) is faster. Magnetic Particle Testing (MT) 6 It uses magnetic fields and iron particles to find surface and near-surface defects. It is standard for structural steel sourcing.
Volumetric NDT for Internal Integrity
For high-stress beams, you need to know what is inside the weld. Two methods do this: Ultrasonic Testing (UT) and Radiographic Testing (RT).
RT uses X-rays. It creates a picture (film or digital) of the weld interior. You can clearly see porosity (gas pockets) and slag inclusions. It provides a permanent record. However, it is slow and requires safety precautions. safety precautions 7
UT uses sound waves. It is excellent for detecting planar defects like lack of fusion or cracks. These are the most dangerous defects. Modern UT equipment with phased arrays provides detailed images. We often ask for UT reports on thick-section butt welds because it is safer and faster than RT.
The Macro-Etch Test: The Sample Special
Since you are evaluating a sample, you have a unique option: destructive testing. We highly recommend asking for a "Macro-etch" report. The supplier cuts the sample weld in half, polishes the cross-section, and applies acid.
This reveals the weld nugget structure. You can see the depth of penetration. You can see if the fusion to the root is complete. You can see internal porosity. This is the definitive proof of a welding procedure. If the sample fails the macro-etch, the settings on the machine are wrong.
Selecting the Right Report
You do not need every test for every part. It costs money. Use this guide to decide which reports to demand from your supplier.
| NDT Method | Best Used For | What it Detects | Limitation |
|---|---|---|---|
| Liquid Penetrant (PT) | Aluminum, Stainless Steel | Surface cracks, porosity | Surface breaking defects only. |
| Magnetic Particle (MT) | Углеродистая сталь | Surface & near-surface cracks | Ferromagnetic materials only. |
| Ultrasonic (UT) | Thick materials (>8mm) | Internal cracks, lack of fusion | Requires skilled operator; expensive. |
| Radiography (RT) | Butt joints, Pipes | Porosity, slag, inclusions | Safety hazards; slow process. |
| Macro-Etch | Первоначальные образцы | Penetration depth, root fusion | Destroys the sample part. |
Which international welding codes or standards should I reference when evaluating the sample's penetration and fusion?
We often guide clients through code selection to match their specific industry safety requirements. Using the wrong standard can lead to over-engineering or dangerous failures.
Reference AWS D1.1 or D1.2 for structural steel and aluminum applications to evaluate penetration depth. For pressure-containing parts, utilize ASME Section VIII, while ISO 5817 provides excellent quality levels for general manufacturing tolerances regarding fusion and bead geometry.

Structural Standards: AWS
For the aluminum frame described, the American Welding Society (AWS) standards are the gold standard in the US. specifically, AWS D1.2 (Structural Welding Code – Aluminum).
If your frame was steel, you would use AWS D1.1. These codes are very specific. They define "Complete Joint Penetration" (CJP) and "Partial Joint Penetration" (PJP). For a CJP weld, the code requires fusion through the entire thickness of the metal. If your macro-etch shows the weld stopped short, the sample fails AWS D1.2.
These codes also dictate the profile. They limit how high the reinforcement (the bump on top of the weld) can be. Usually, it cannot exceed 1/8 inch. Higher than that is not "stronger"; it is a stress riser.
Pressure Standards: ASME
If your welding parts are for tanks or pipes that hold pressure, you must use ASME Section VIII или ASME B31.3. These are far stricter than structural codes. They have zero tolerance for inadequate penetration.
While your aluminum frame is likely structural, knowing the difference helps. If a supplier claims they weld to "ASME standards" for a simple frame, they might be over-charging you. ASME standards 8 Or, they might be bluffing. Always ask which specific section they are following.
International Standards: ISO 5817
In Asia and Europe, suppliers are very comfortable with ISO 5817. This standard is excellent because it has three clear quality levels:
- Level D (Moderate): Good for general hangars or non-load bearing parts.
- Level C (Intermediate): Standard for most machinery.
- Level B (Stringent): Required for cyclic loads and pressure vessels.
For your custom frame, specifying "ISO 5817 Level C" is a clear, globally understood instruction. ISO 5817 Level C 9 ISO 5817 Level C 10 It tells the supplier exactly how much porosity is allowed without needing a 400-page AWS code book.
Verifying the WPS and PQR
Codes are not just about the final inspection. They are about the process. When you receive the sample, ask for the WPS (Спецификация сварочной процедуры). This document tells the welder what amps, volts, and travel speed to use.
Then ask for the PQR (Procedure Qualification Record). This proves that the settings in the WPS actually produce a strong weld. If the supplier cannot provide these, they are guessing. "Tribal knowledge" is not a standard. We ensure every factory we work with has a valid PQR for the specific joint design in your drawing.
Code Selection Matrix
| Application | Recommended Code | Основное внимание |
|---|---|---|
| Structural Steel | AWS D1.1 | Strength, Ductility, Fatigue |
| Structural Aluminum | AWS D1.2 | Oxide removal, Porosity, Fusion |
| Pressure Vessels | ASME Section VIII | Leak tightness, Safety factors |
| General Machinery | ISO 5817 Level C | Visual profile, consistency |
| Aerospace / High Tech | AWS D17.1 | Precision, X-ray quality |
What is the best process for documenting and communicating defects if the welding samples do not meet my specifications?
We reduce rework by documenting defects clearly and visually for our partner factories. Vague complaints like “bad welding” lead to repeated failures and strained relationships.
Document non-conformance by marking up photos and engineering drawings with specific code references for every defect found. Submit a formal rejection report requiring a Root Cause Analysis and corrective action plan to ensure the next batch meets your specifications.

The Rejection Report
Never just say "rejected." You must create a formal Inspection Report. This report is your primary tool for improvement.
The report must include high-resolution photos. Do not just take a wide shot. Use a macro lens or your phone's macro mode. Circle the defect in red. Next to the photo, paste the section of the standard that was violated. For example: "Defect: Undercut. Measurement: 1.5mm. Standard: AWS D1.2 limits undercut to 1mm. Result: FAIL."
This removes emotion from the conversation. You are not saying their work is bad; you are saying it does not meet the agreed text.
Communicating with Suppliers
When dealing with suppliers in Vietnam or China, clarity is king. Language barriers exist. Long paragraphs in emails are often ignored or misunderstood.
Use visual aids. We annotate the engineering drawing itself. We point arrows to the specific weld locations that failed. We use color codes: Green for Pass, Red for Fail.
We also organize a video call to review the report. We hold the physical part up to the camera. We show them exactly how we are measuring. Sometimes, the supplier is measuring differently. Calibrating your inspection methods is as important as calibrating your tools.
Demanding Root Cause Analysis (RCA)
Do not just ask for a new sample. Ask why the first one failed. Request an 8D Report or a simple Corrective Action Plan (CAP).
If there was porosity, was the gas nozzle clogged? Was the aluminum dirty? If there was lack of fusion, was the amperage too low?
If the supplier cannot answer these questions, they are not controlling their process. They are just hoping the next one is better. By demanding an RCA, you force them to think like engineers.
Digital Tools and Future Trends
The industry is moving toward digital inspection. New tools use AI to analyze photos of welds. While you might not have this, you can use simple cloud tools.
Create a shared folder for "Defect Library." Every time you find a defect, upload it there. Over time, this builds a "Boundary Sample" library. It shows the supplier exactly what is acceptable and what is not. This is far more valuable than a text description.
Checklist for Communication
Use this checklist before hitting "send" on a rejection email:
- Photos included? (Clear, focused, scale reference included)
- Standard referenced? (Quote the specific clause)
- Location mapped? (Shown on the engineering drawing)
- Quantity defined? (Is it one part or the whole batch?)
- Action requested? (Rework, Scrap, or Replace?)
- RCA demanded? (Ask for the "Why" and "How to prevent")
Заключение
Proper sample validation prevents costly production failures. Strict adherence to visual, dimensional, and NDT standards ensures your custom parts perform safely. By verifying against codes like AWS D1.2 and communicating defects clearly with data, you secure a reliable supply chain.
Сноски
1. Technical documentation on ultrasonic testing principles from a major equipment manufacturer. ↩︎
2. General background on visual inspection as a primary quality control method. ↩︎
3. Official source for American Welding Society structural codes and standards. ↩︎
4. Official government standards for measurement and dimensional verification. ↩︎
5. Authoritative industry guide on the testing method. ↩︎
6. General background on magnetic particle inspection for steel components. ↩︎
7. Official safety guidelines for welding and radiographic testing from OSHA. ↩︎
8. Official ASME site for pressure vessel construction standards. ↩︎
9. Official ISO standard page for welding quality levels. ↩︎
10. Official ISO standard for quality levels of imperfections in fusion-welded joints. ↩︎